The Outlook Add-In allows you to document email communication and message attachments into your Top Echelon Recruiting Software database directly from Outlook 365. This article provides step by step instructions for installing the Add-In.
Please note that this Add-in will only work with Outlook hosted email. You must also be on the Monthly Channel for updates.
To check the build:
- Navigate to File, click Office Account, and take a look at the About Outlook section
- It should look something like this:


To install the Add-in within Outlook 365:
- Start by opening Outlook 365
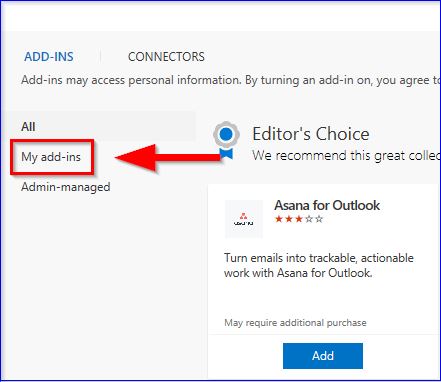
- Click the Get Add-ins button on the top ribbon menu

- Click My add-ins

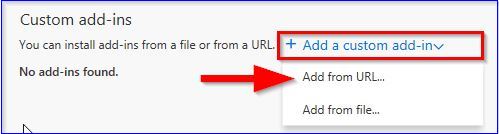
- Scroll down to Custom add-ins
- Click +Add a custom add-in and then select Add from URL…

- Paste the below address into the field provided:
- Click OK
- You should now see a Top Echelon / Top Echelon Recruiting Software pyramid icon show up in the top ribbon menu (usually to the left of your Get Add-ins button)

To install the Add-in in Outlook.com
- Open a message in your inbox
- Click the […] menu in the top right of the message

- Click get Add-ins and then select My add-ins
- Scroll down to Custom add-ins and click Add a custom add-in
- Select Add from URL…
- Paste the below address into the field provided:
- Click OK
- You should now see a Top Echelon / Top Echelon Recruiting Software pyramid icon show up in the […] menu in every message

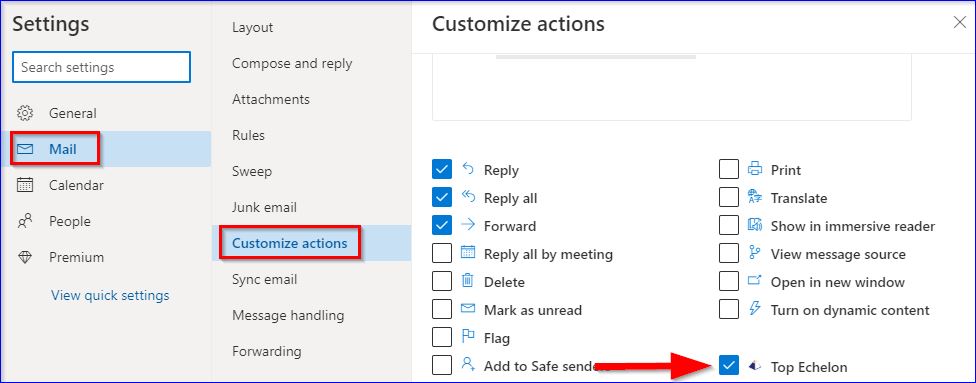
To pin the Add-in inside the message view:
- Click the gear icon in the top right of Outlook.com
- Click View all Outlook settings at the bottom of the popup menu
- Click Mail and then select Customize actions

- Check the box next to the Top Echelon icon in the list of actions
- Click Save
- You will now see the Top Echelon icon when you open any message (and without clicking the […] menu)